Perfect DIY Quarantine Christmas Gifts
Boredom is inevitable for those of us safely quarantining at home, but it’s that time of the season again. Rather than blowing your paychecks or allowances on expensive Amazon wishlists, why not make a few of your own gifts for those you love? Here are some inexpensive pandemic themed Christmas DIYs to hopefully bring you some safe, holiday spirit.
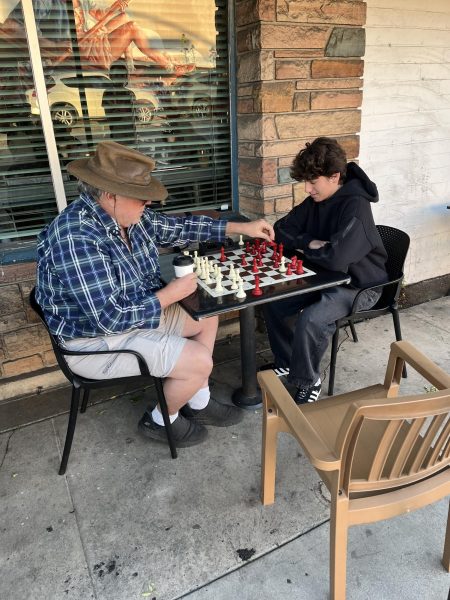
Candy Cane Mask
Disposable masks have proven to rack up quite the cost over time, and the hand-made masks you see all over Etsy and Instagram can cost a fortune. This DIY saves you the cost and provides both function and fashion. Here are the steps:
- Find a plate. (For teens, make sure the plate is roughly 9 in. in diameter. And for adults, 10-11 in.)
- Place the plate face down, on the underside of the fabric of your choice. (researchers recommend a tightly woven cotton fabric -600 threads per inch-. You can use an old dress shirt as long as its cotton and high thread count)race lightly around the plate and cut out the circle you’ve made.
- Fold in half twice, making sure to press down on the folds to create a crease. Then, cut along each fold you’ve made. You should have four equal portions of your circle now.
- Divide them into two pieces, both together, with both patterns or ”nice sides” facing inwards towards each other.
- Now here comes the sewing. Now there’s many videos on youtube you can find for sewing tutorials, but I recommended that after you thread the needle, weave the needle through both sides of the fabrics, creating a scrunch on the needle. Then simply pull through, and repeat till you’re done! Sew along the curved edge of your fabric pieces. (make sure to finish your edges. Again, highly recommend doing a quick youtube search for easy sewing!)
- Do this with both couples of your fabric. Flip one inside out, and place one inside the other, perfect sides facing each other. ——-(For Candy Cane Heart Embroidery)———
You will need red and white embroidery floss, a pencil, and a normal needle should work fine
- Lightly sketch two cane shapes (to whatever size you want) onto the side you want showing. You could sketch a heart first, and then create the candy cane shape on the inner side.
- After threading and knotting the needle, take your first color, and put the needle from the bottom side, that won’t be showing, and pull it through the top.
- Go across to form a small stripe, and pull your needle through the bottom again. You can repeat again to make thicker stripes.
- Skip a space equal to the side of the stripe you made, and continue with your first color, starting a new stripe.
- After you’re done with the first color, finish and tie off the floss, making sure it’s where you won’t see it. (on the inner fabric side you won’t see.)
- Repeat with the next color, filling in the spaces you left empty, to form the perfect candy cane stripe.
- Sew these both together, but remember to leave a small space unstitched so you can flip it inside out, so the side you want seen can be shown!
- Now, iron all the edges. (Remember to pay special attention to the pointy parts, that is where we attach the elastic later.)
- Roll the edges enough to make a small cylinder, (about the size of an eraser on the end of a pencil) and stitch the edge towards the inside of the mask. Repeat on the other side
- Take your elastic, which can be salvaged from an old scrunchie, and thread it through the space you’ve made by sticking your elastic through the end of a bobby pin, and pulling it through the hole.
(Elastic sizes: Teen ~7in. Adult ~8in.)
- Repeat on both sides. Tie the ends into a knot, and pull through so the knot is concealed inside the mask.
Just like that, you’re done! Sewing and embroidery can be very relaxing, which we all could use a little more of in these times. To amp up the holiday vibes, place a dot of peppermint extract or essential oil on the inside of your mask, it adds to the holiday spirit and also aids in relaxation.
Christmas Cookie/ Peppermint scented Hand Sanitizer
Hand sanitizer is an essential product in today’s households. It’s sold everywhere now, but the price has only gone up since the COVID-19 pandemic began. Much like masks, hand sanitizer over time has proven to be costly. But making your own, can not only save you the cost (especially if made in bulk), but you control the quantity and quality of the ingredients yourself.
- You will need: ⅔ Cup Isopropyl Alcohol (60% or higher), ⅓ Cup Aloe Vera Gel, some bottle/container to put it in, plus any essential oil/extract of your choice. (Use vanilla or peppermint extract if you can’t find the oil, but the dollar store does sell oils from time to time, as well as travel sized bottles for on the go!)
- Steps are pretty simple here, first put in the isopropyl alcohol, and then add the aloe vera gel and 8-10 drops of your scent.
- Mix VERY well (aloe will need to dissolve, so mix for a good 1~2 minutes)
- Funnel or gently spoon mixture into the container of your choice.
You can also decorate the bottle with markers or stickers to add some extra holiday cheer.
A simple and highly useful DIY when you don’t want to waste money on some foul smelling hand sanitizer that dries out your skin, or when you’re in a crunch and need to whip some up on the double. This way, you save yourself the cost and have some fun in the meanwhile. And please remember: Hand sanitizer should NOT be used in place of washing your hands, it should only be used when soap and water are unavailable, as the CDC guidelines state.
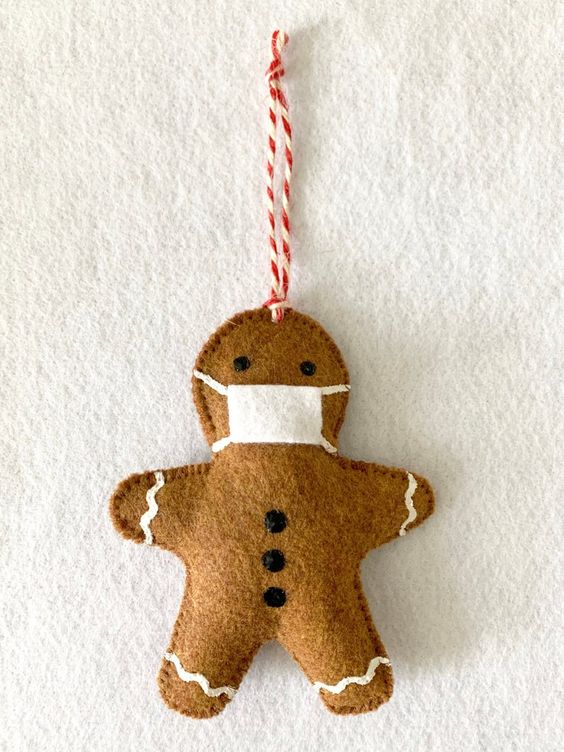
Masked Christmas Tree Ornaments
Okay, you might think this is going a bit overboard, but who says our little ornaments cant be safe as well? This is the perfect DIY you could do with younger siblings, and it will also help them see that masks aren’t all that weird. These times have been very uprooting, terrifying, and uncertain, we could all use a fun little break, especially with loved ones at home.
- We will be making a masked Snowman and Gingerbread man! Here’s what you will need: 1 sheet each of craft felt in the following colors; brown, red, black, white, and pale blue. (Which are all sold at Michaels for about 40¢ a sheet). For younger kids, you could help them use hot glue (hot glue would work best, and is also available at the dollar store) or a strong white glue. For older, you could use some of the leftover embroidery floss to sew them together with a whip stitch. Twine or ribbon, and finally, some cotton balls.
- For the snowman: Trace a circle on your white felt. (You could use the mouth of a glass, depending on how large you want your snowman.) Then, trace a circle about half the larger circle, on top of the larger circle, and slightly intersect them. You’re essentially drawing the number 8.
- Cut that shape out, place it on the rest of the white felt sheet, and trace again.
- Glue a loop of ribbon right at the top of the snowman’s head, and continue gluing all the way round, to attach both sides of the snowman together. But REMEMBER: leave a small opening at the bottom so we can stuff it.
- To stuff the snowman/gingerbread man: After leaving a hole on the bottom of the snowman, or on the head of the gingerbread man, unravel the cotton balls (amount varies depending on how big your ornament will be), and then stuff them inside with the back of a pencil or chopstick.
- For the Masks, cut out an appropriately sized square of blue or white felt to cover the lower portion of their face. And then four small strips to act as the elastic bands.
5) Now, after stuffing your ornament, seal it with the hot glue. If using white glue, make sure the glue dries completely before stuffing your ornament, and resealing.
6) Cut out 2 small circles for eyes, and 3 buttons, out of black felt. Take the red felt, and cut out a red felt rectangle, and another smaller one to put on top as a scarf for our snowman. Glue on the mask and decorations. And now you have your safe snowman!
7) For the gingerbread man: Cut out a person’s shape on your brown felt, so two arms and two legs, along with a head on top. Remember they don’t need to be perfect, cookies are imperfect just like people.
8) Then, place on the brown felt, trace and cut out the shape again.
9) Glue both pieces together, remembering to leave an opening at the top to stuff the ornament, along with a space to attach the ribbon, so you can hang your ornament.
10) After stuffing the ornament, cut out again, two small circles for eyes, and three for buttons. Along with four white felt wavy frosting lines, to go on the arms and legs of your gingerbread man.
11) Glue on the mask and decorations and you’re done! Go decorate!
2020 was a tough year, and we need a smile, especially during the holidays. Many of us haven’t been able to see our extended family, and still won’t for an indefinite amount of time. Use these DIYs to keep yourself happy and at ease—nobody needs any extra stress these days.
So please, stay safe at home with your loved ones!
Your donation will support the student journalists of Venice High School. Your contribution will allow us to purchase equipment and cover our annual website hosting costs.